First Print
Congratulations on building your 3MS! Now to get started with a first print.
Slicer Setup
This tutorial will walk you through setting up the 3MS with OrcaSlicer. If you use another slicer, some settings may differ.
Credit
This tutorial is based off of the original Happy Hare slicer setup docs, available here.
Machine Settings
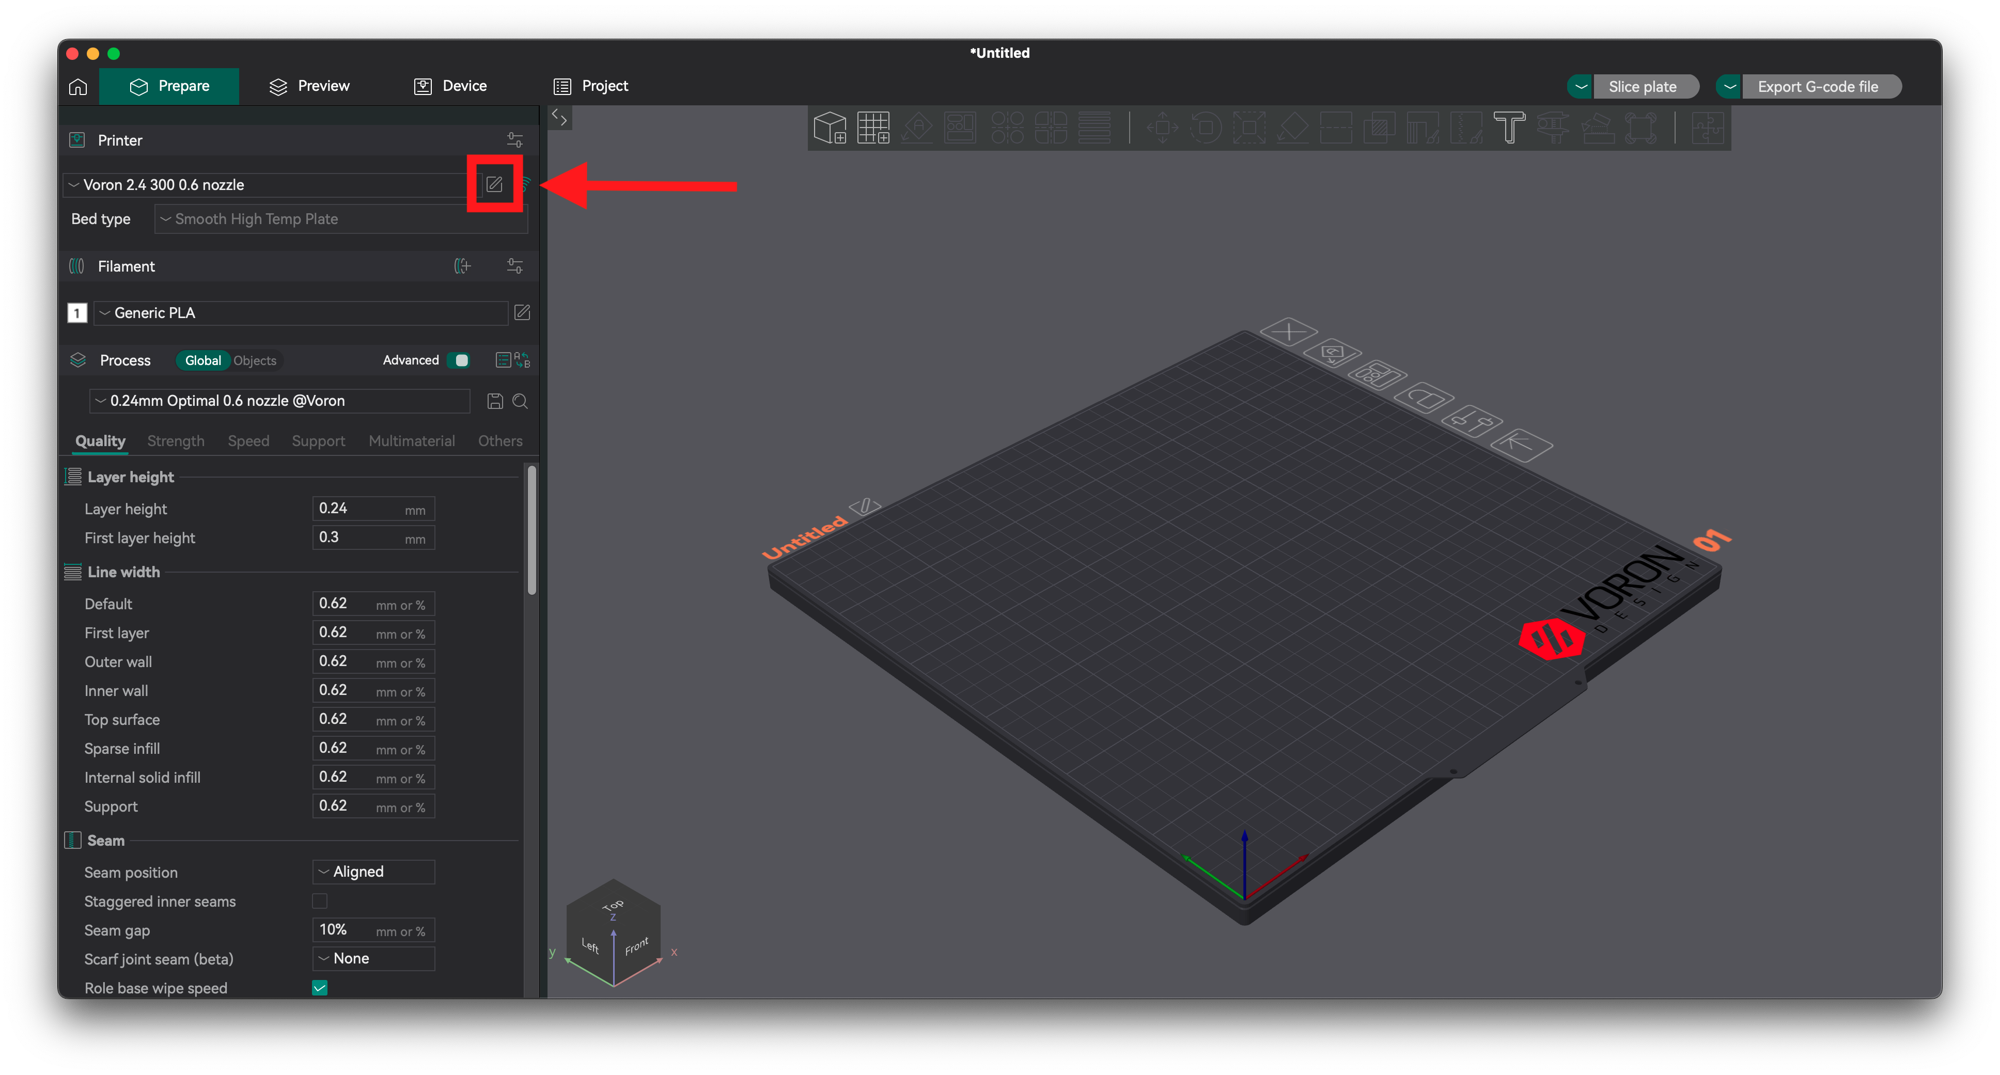
Begin by opening your machine settings.
Navigate to Machine G-Code.

Start G-Code
Prepend your Machine start G-code with the following:
Then, append the following below your existing G-code:
End G-Code
Prepend your Machine end G-Code with the following:
Then, append the following below your existing G-code:
Layer Change G-Code
Scroll down and edit your layer change G-Code.
Add the following:
Save this machine preset with a new name.
Filament Settings
Filament Cutting vs. Tip Forming
It is recommended you install a filament cutter on your printer. This will make your toolchanges much more reliable and negate the tuning tip forming requires.
You can find user-submitted tip cutting/forming configurations here.
If you want to do tip forming and can't find the right configs for your setup at the above link, you will have to tune the values yourself. In general:
- Less cooling moves or higher temperature = stringy tips
- More cooling moves or lower temperature = blobby tips
- Skinnydip string reduction = less strings
Please upload your settings here once you tune yours in so other users can benefit!
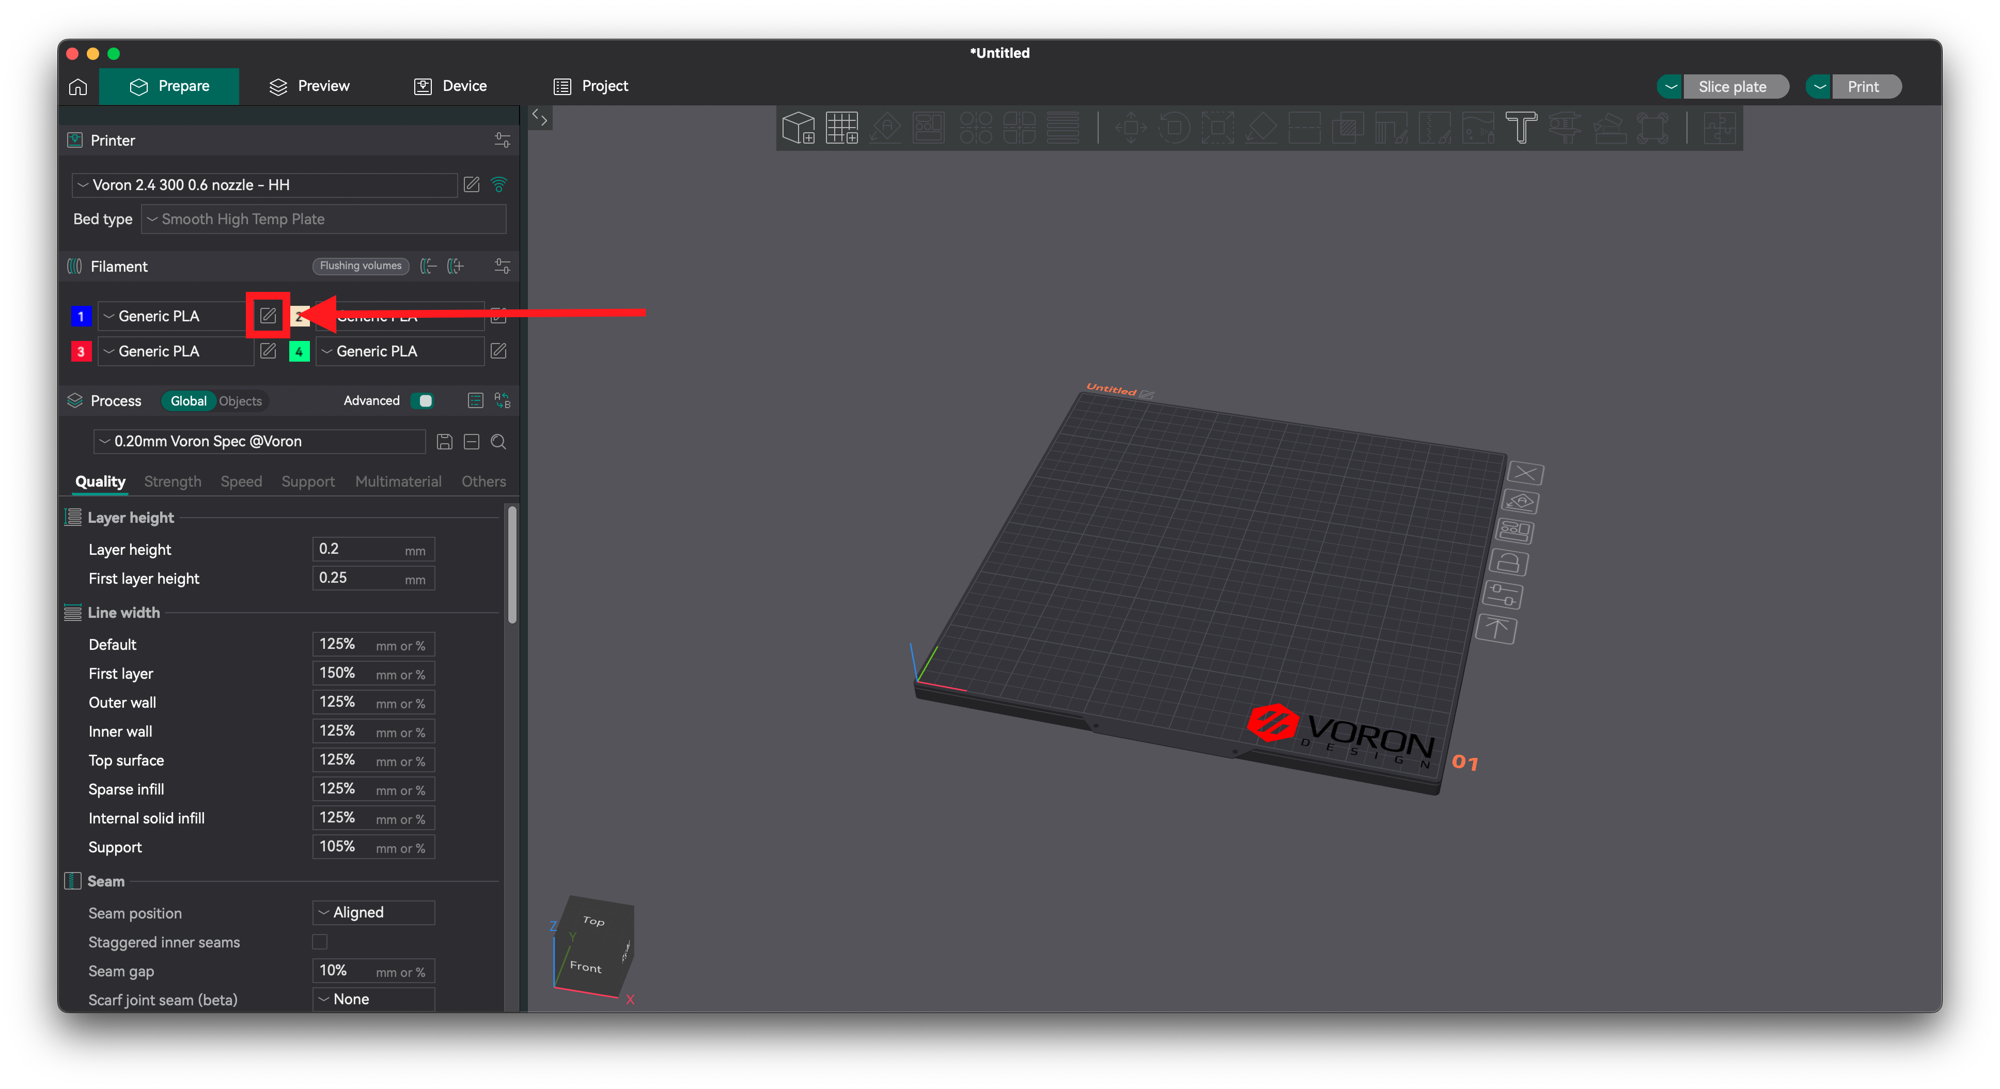
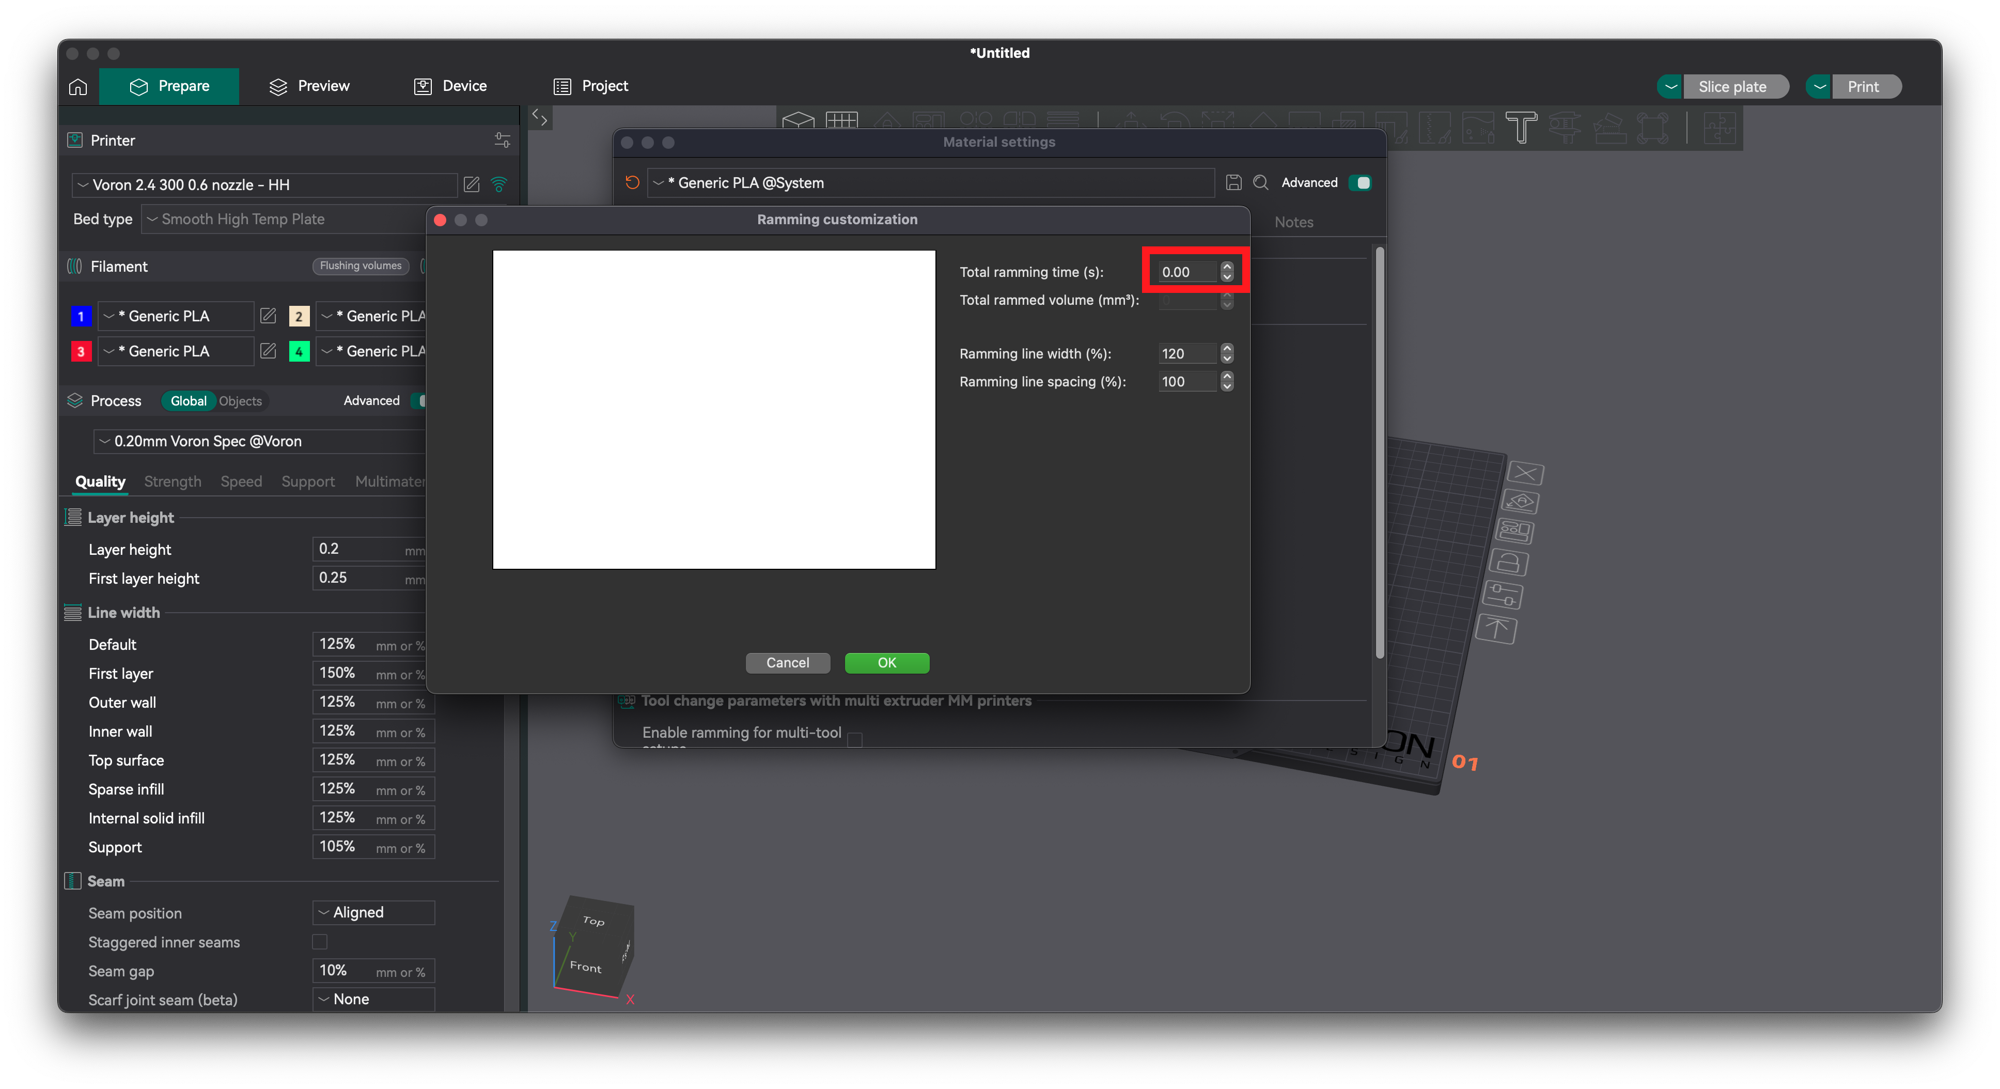
Begin by opening your filament settings.
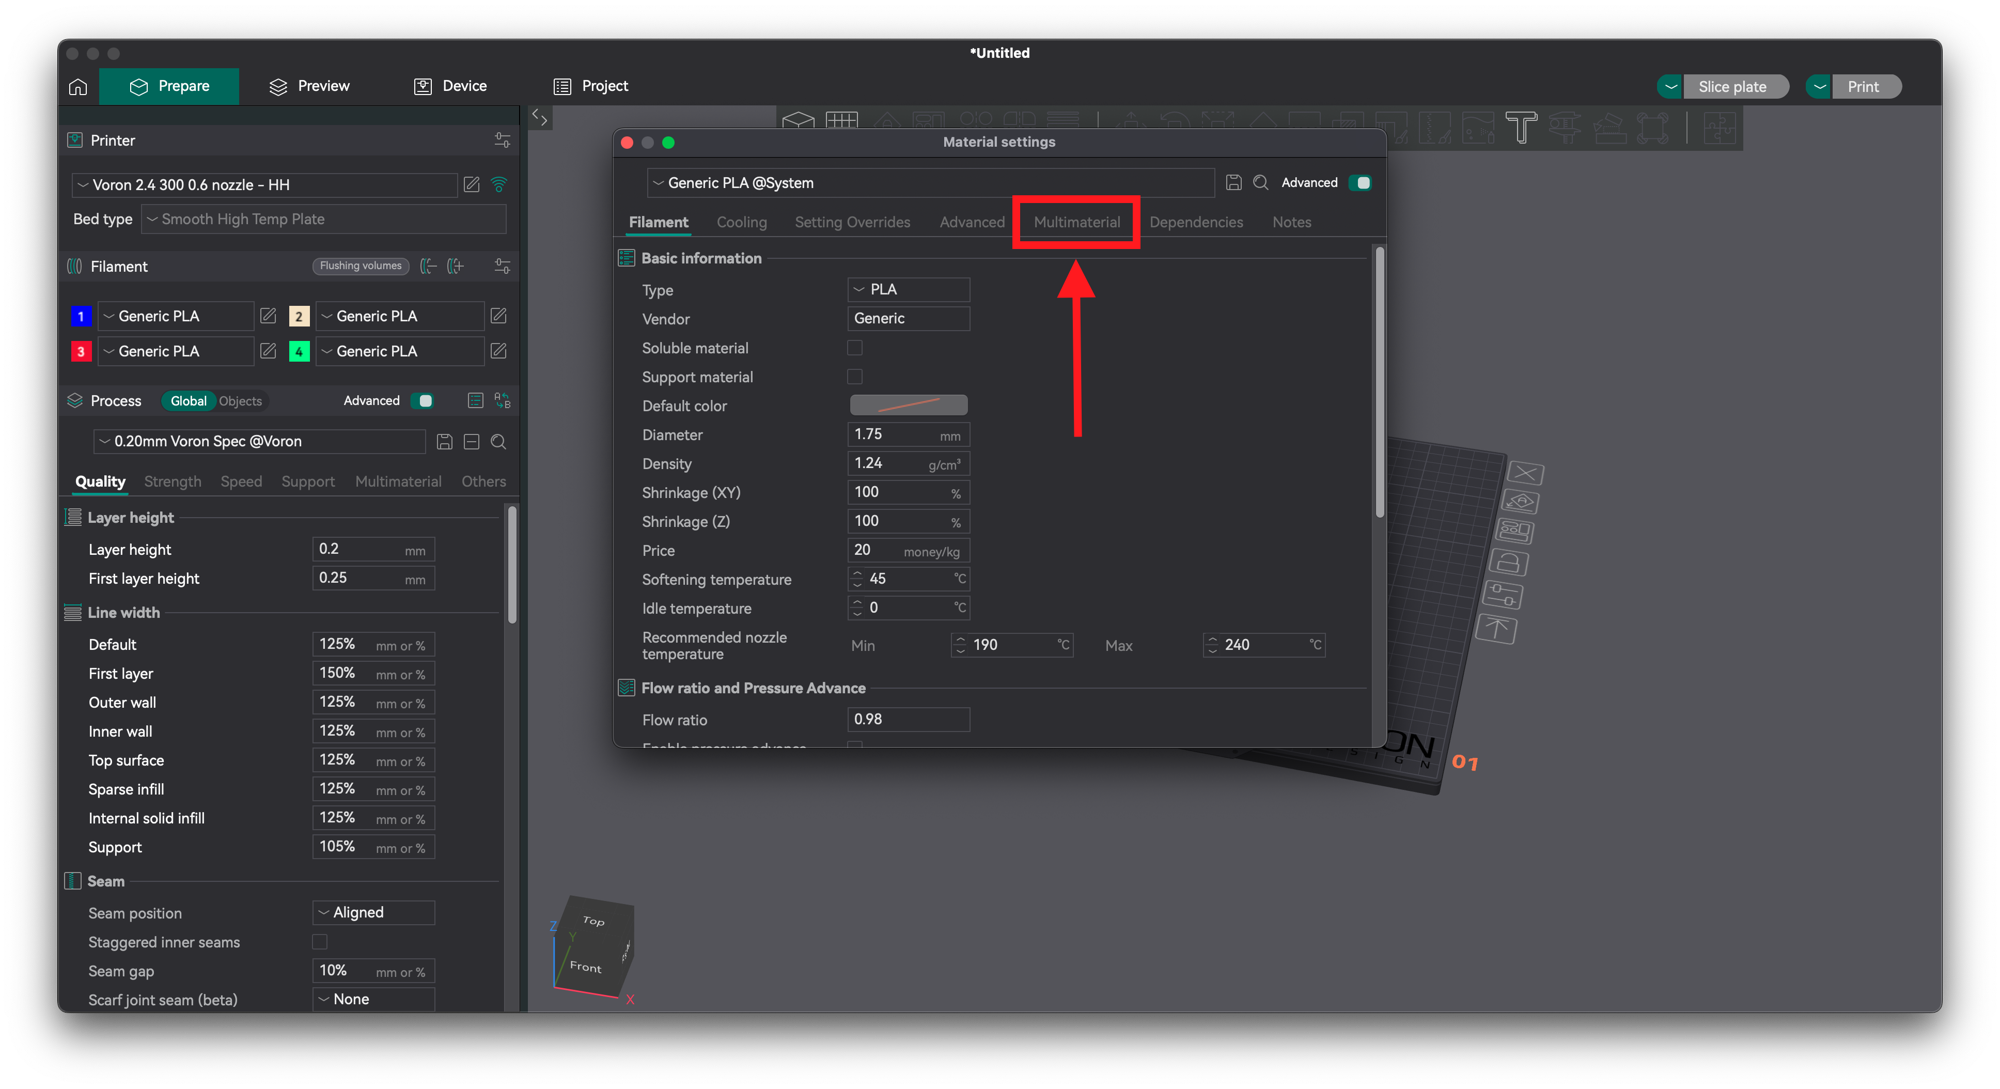
Navigate to Multimaterial.
Disable Tip Forming
Set all the indicated fields to 0 and open the ramming settings.
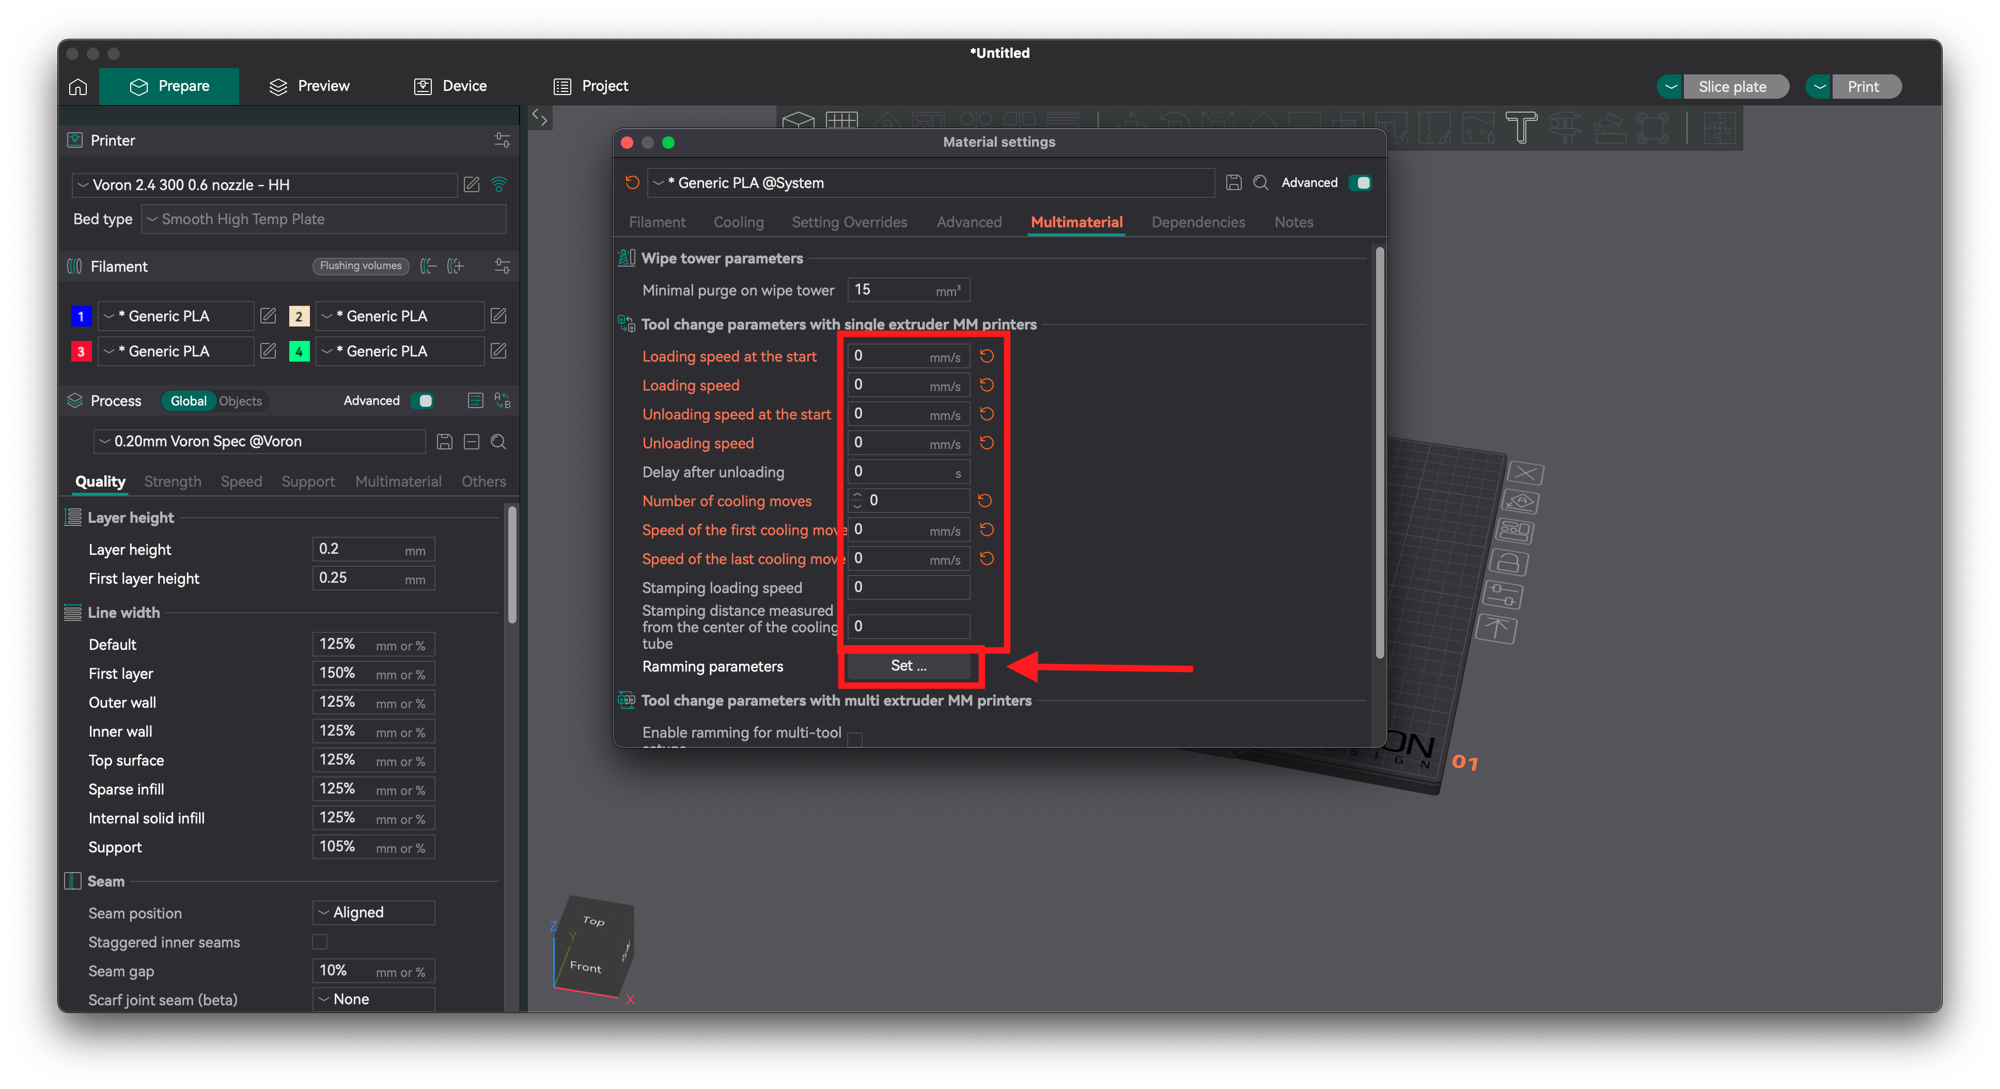
Set the ramming time to 0.
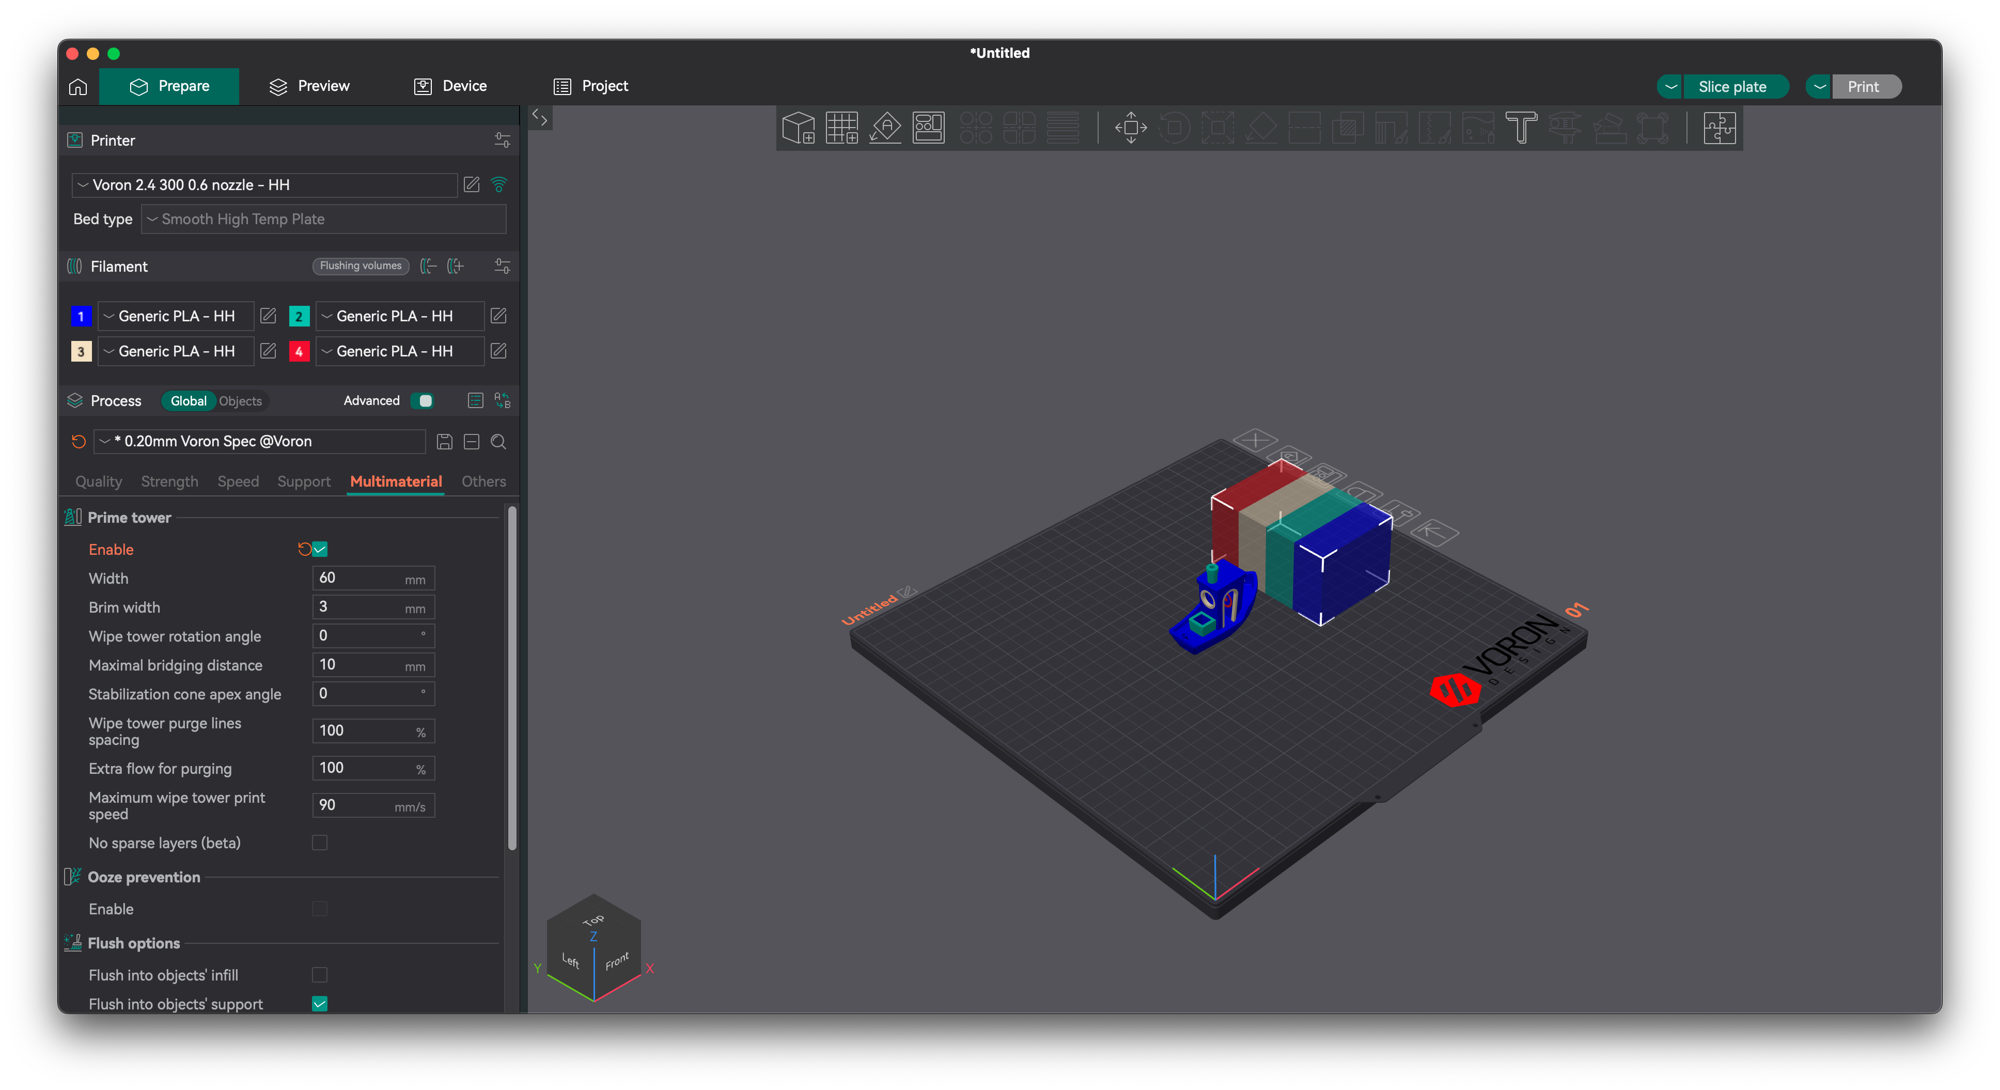
Your First Print
This section will cover one way to start multicolor 3D prints. Note that typically, multicolor 3D models will come pre-painted or in multiple parts, so the process will be slightly different.
Begin by loading the model into the slicer.
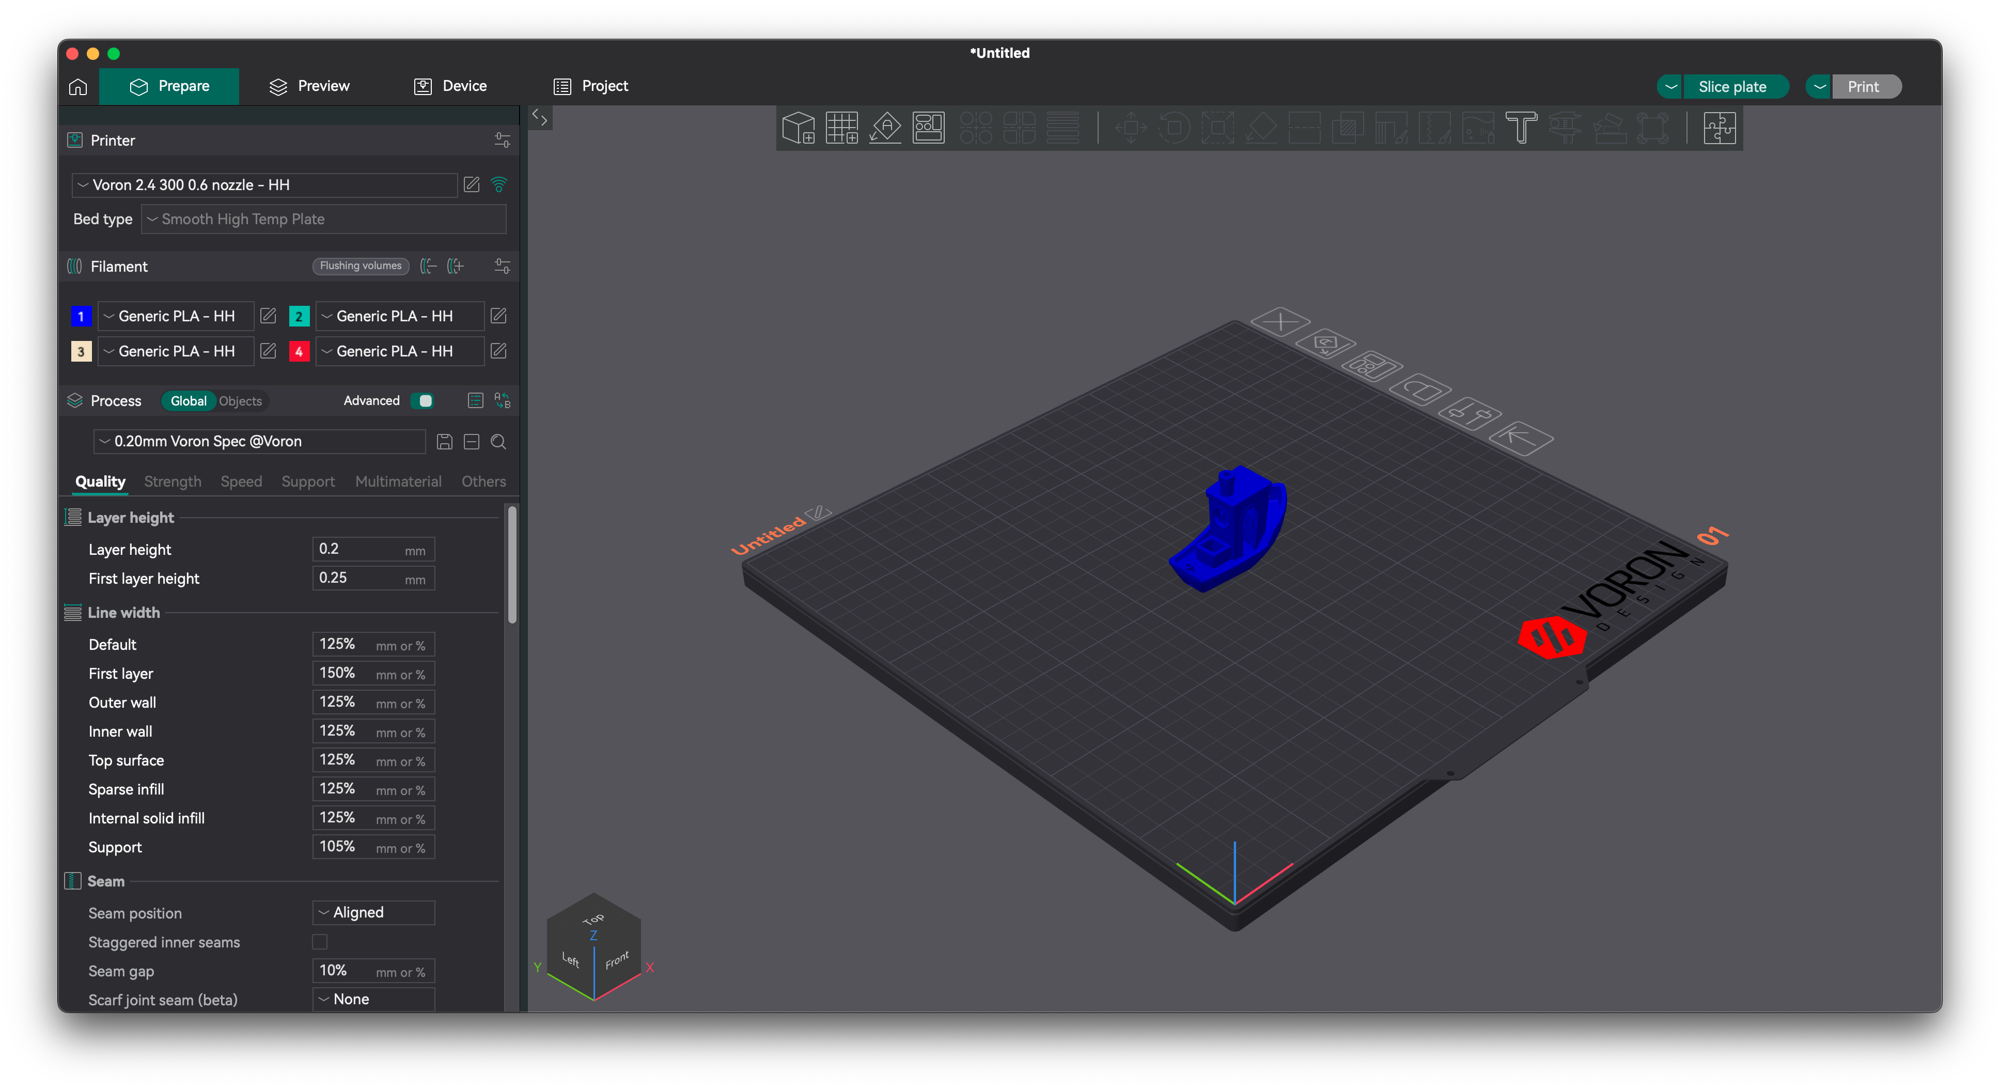
Select the model and click multicolor painting.

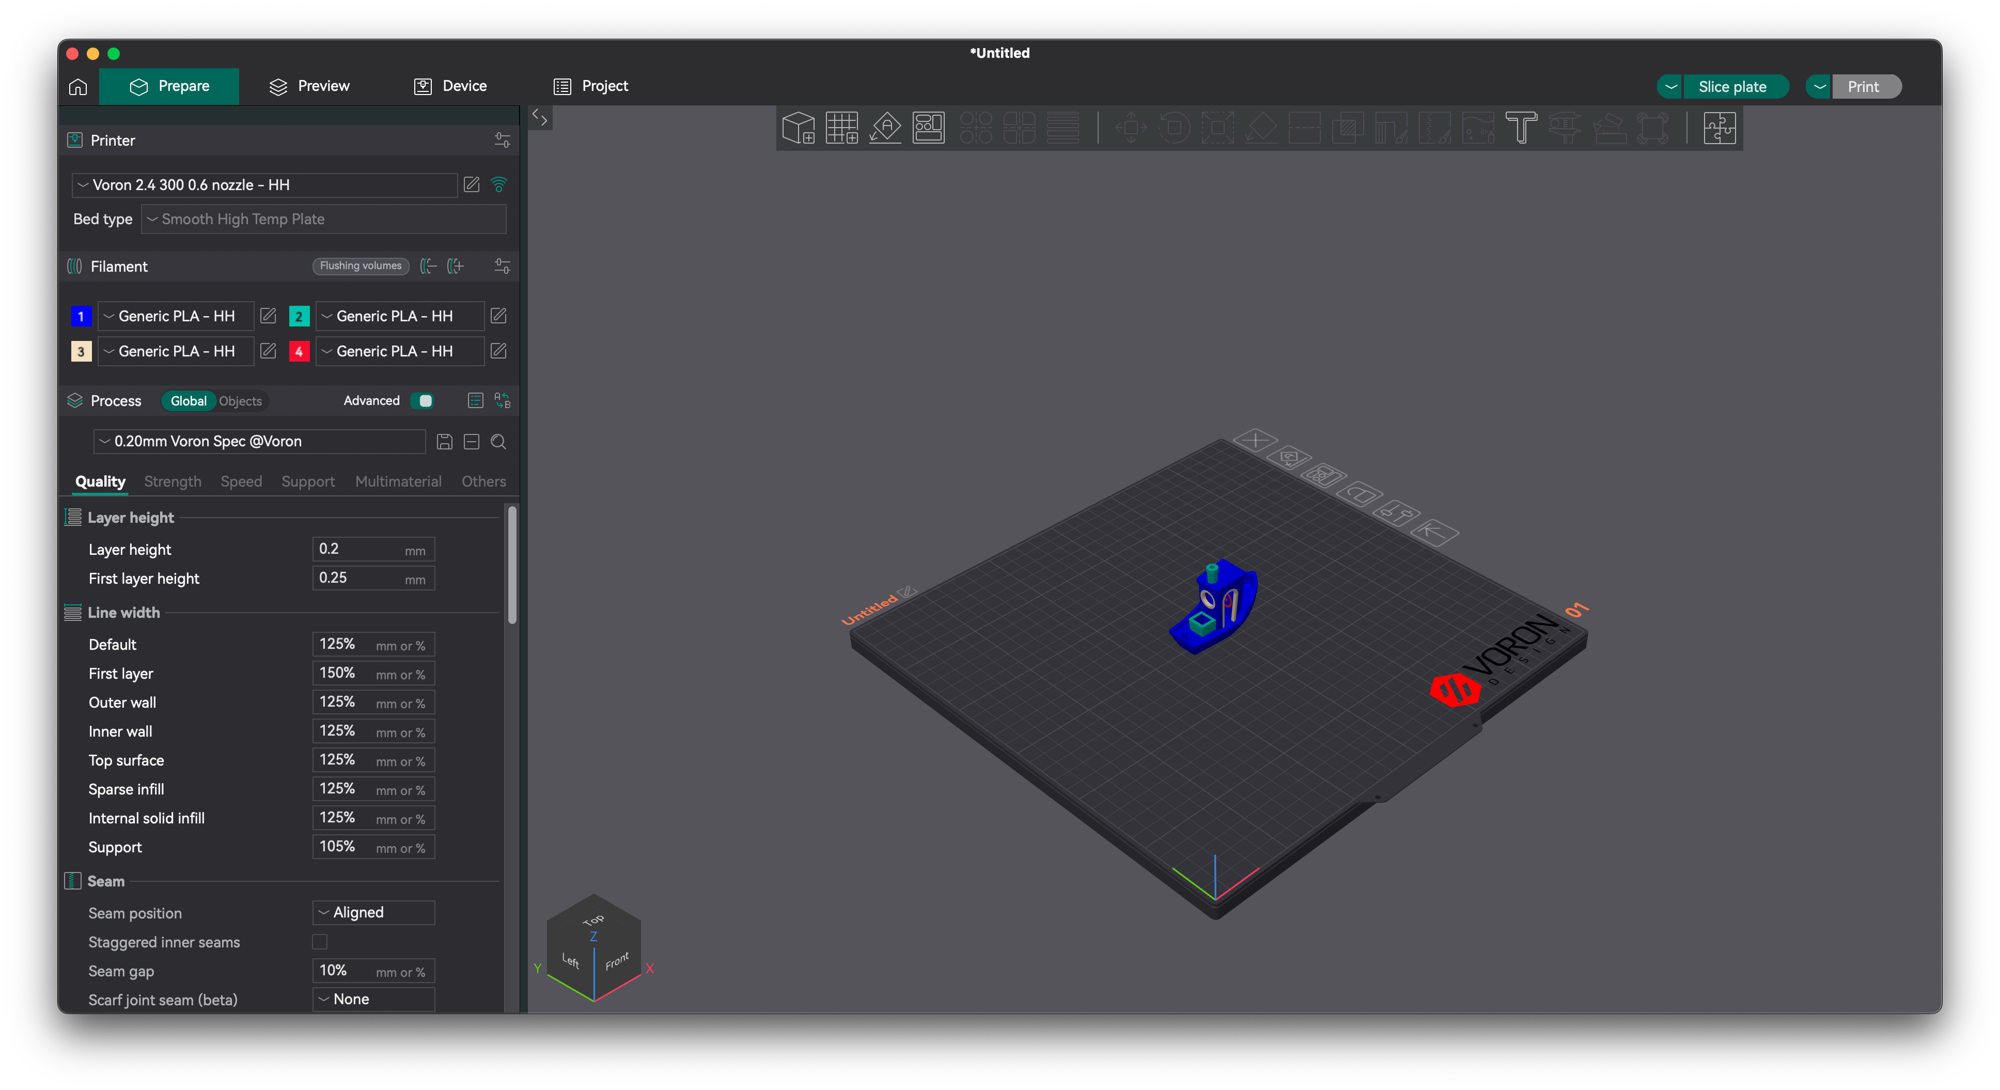
Paint the model as you like.
Ensure the prime tower is enabled.
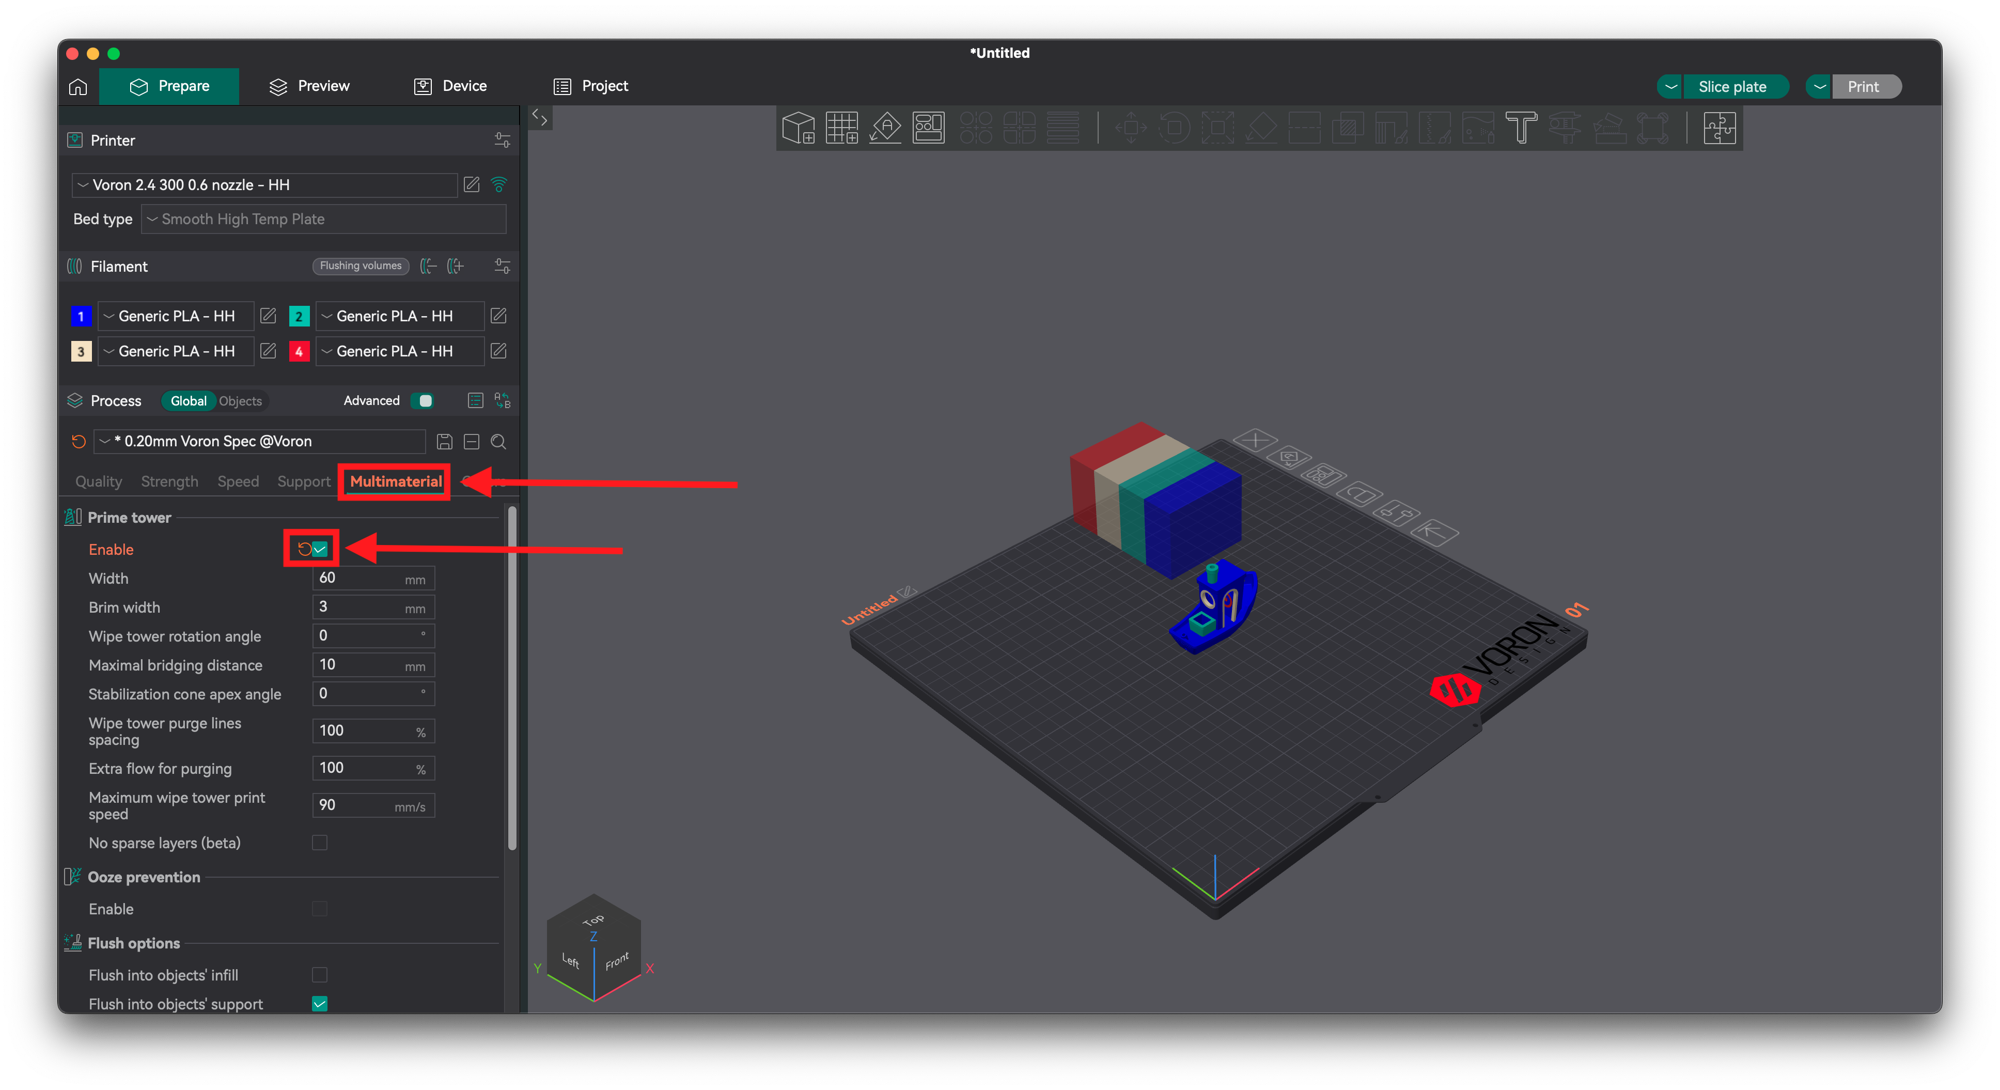
Arrange the prime tower on the plater.
Slice and print!

I would really appreciate a star on GitHub if you enjoyed this project!