BTT SKR Pico
Firmware Installation
Setting up firmware for the SKR Pico can be divided into four major steps:
- Compile Katapult (bootloader)
- Flash Katapult
- Compile Klipper
- Flash Klipper
Compiling Katapult
You have two options for installing Katapult to the SKR Pico:
Run the following commands in SSH:
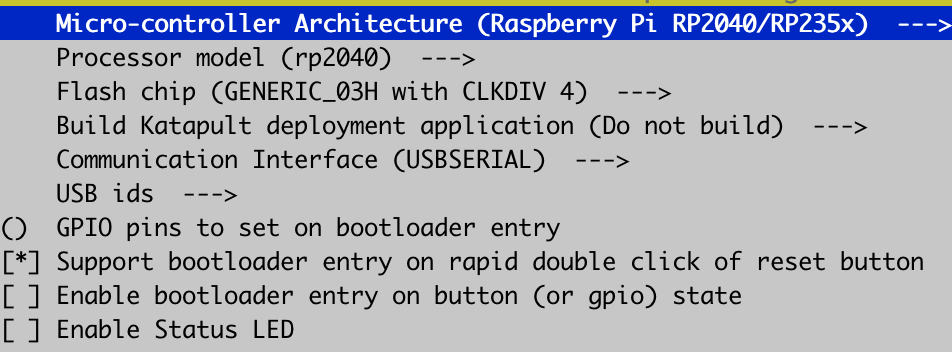
Adjust your menuconfig parameters to match the following exactly.
Then, run:
Now in Mainsail/Fluidd, download katapult.uf2 from your printer's config folder onto your computer and proceed to flashing.
Download katapult.uf2 to your computer and proceed to flashing.
Flashing Katapult
Now that you have katapult.uf2 on your computer, install the BOOT and VUSB jumpers onto the SKR Pico as shown in the below diagram.

Credits: Voron Design
Plug the SKR Pico into your computer with the USB-C cable that came with it. It should show up as a USB drive.
Drag katapult.uf2 into the drive. It should quickly disconnect then reconnect itself.
Now, remove the BOOT jumper and unplug the Pico from your computer.
Compiling Klipper
Now, SSH into your Pi again and run the following commands:
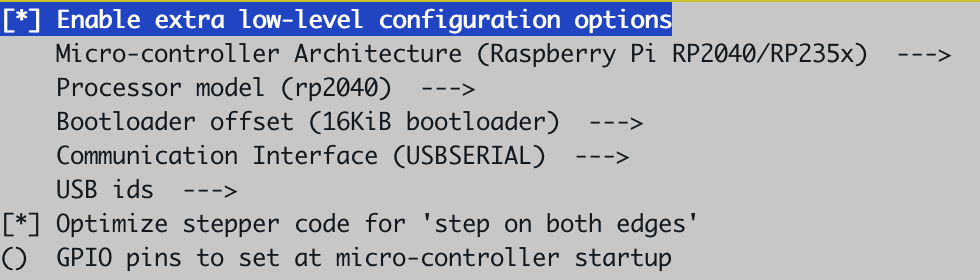
Adjust your menuconfig settings to match this exactly:
Now, run:
Flashing Klipper
Run in SSH:
Plug the Pico into your Pi and double-click the RESET button.
There should be a new USB device shown after plugging the Pico in. Copy the entire path, including /dev/serial/by-id/, and run the final commands:
Your SKR Pico is now successfully flashed with Katapult and Klipper.